Assigning a myACCESS Device Subscription
To enable myACCESS Device functionality, you must first purchase a subscription through the official DataTalk shop:
Activation & Assignment Process
Once the subscription is purchased, it is immediately active. To assign the subscription to your device, follow these steps:
- Access the myACCESS Management Portal
Navigate to:
➡️ https://shop.data-talk.eu/myaccess-portal/ - Find Your Unassigned Subscription
In the portal, go to the “Not Assigned” tab.
Here you will find all available (unassigned) device subscriptions. - Get the HW-ID from DataTalk Manager
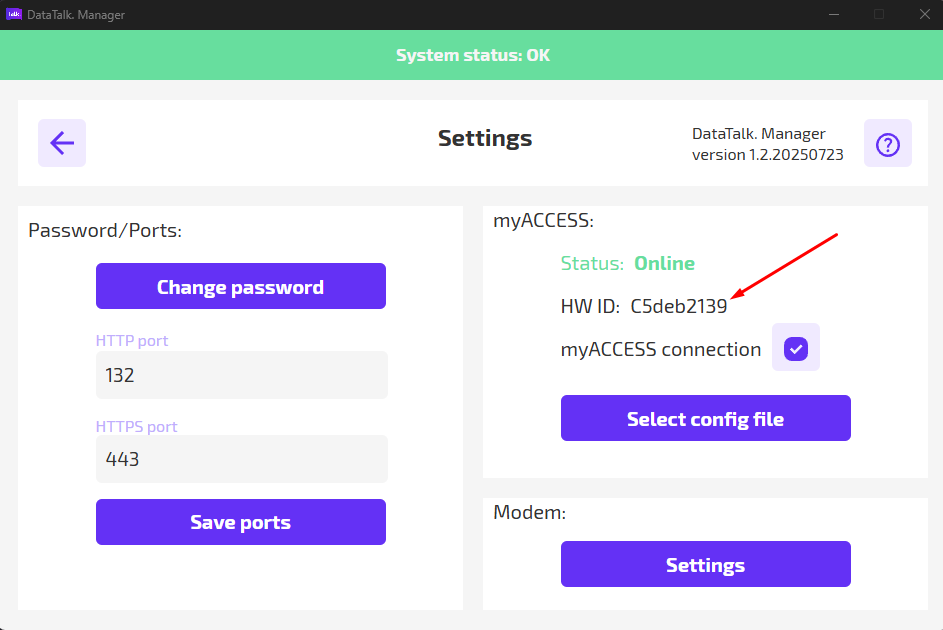
- Open DataTalk Manager
- Go to the Settings section
- Locate and copy the HW-ID
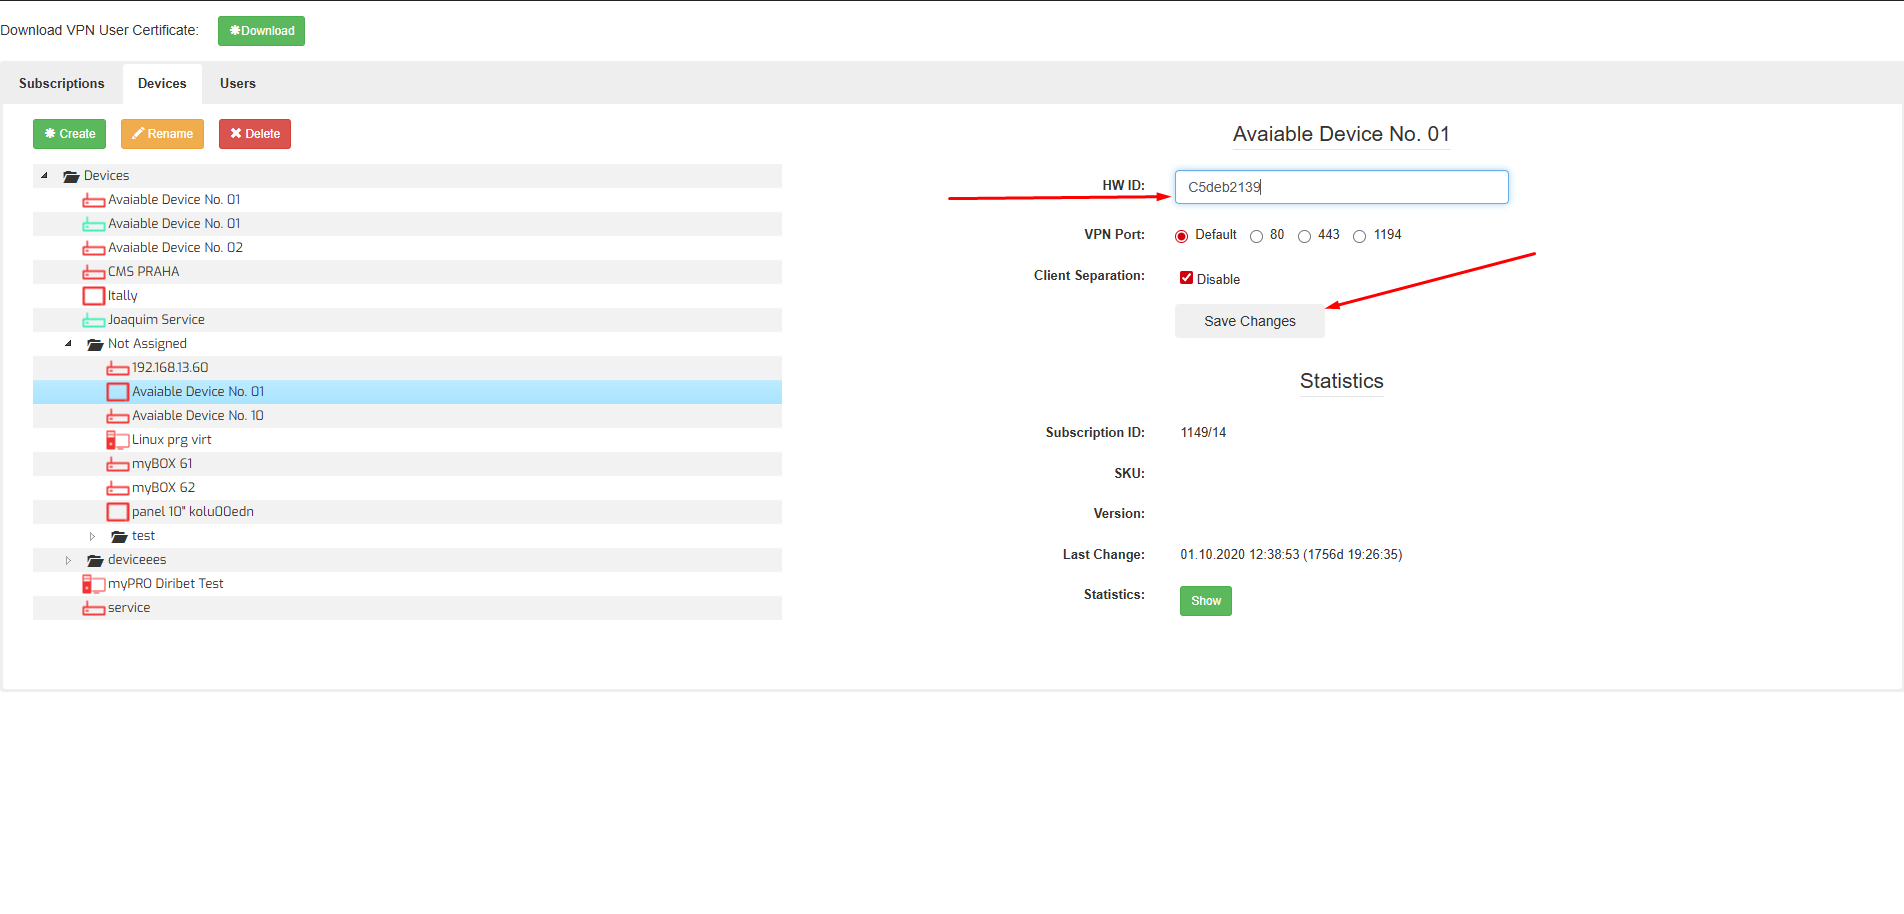
- Assign the Subscription
- Paste the HW-ID into the HW-ID field in the myACCESS Portal
- Click “Save Changes”
- Download Configuration Data
After saving, an option will appear to download configuration data- This will be a
.zipfile
- This will be a
- Upload Configuration to DataTalk Manager
- In DataTalk Manager, upload the downloaded
.zipfile - Stop and restart the runtime
- In DataTalk Manager, upload the downloaded
Once restarted, the device will connect automatically to the myACCESS cloud, enabling secure remote access.
myACCESS VPN application
The myACCESS VPN service provides secure remote access to devices and their local networks using a subscription-based model. For each VPN connection, it is required to have one subscription per user per device.
1. Download the Application
To begin, download the myACCESS VPN Client (.exe) file from the official DataTalk website. This application is only supported on Windows OS and must always be run as Administrator for proper functionality.
2. Purchase a User Subscription
Purchase the myACCESS User subscription from the official shop:
➡️ https://shop.data-talk.eu
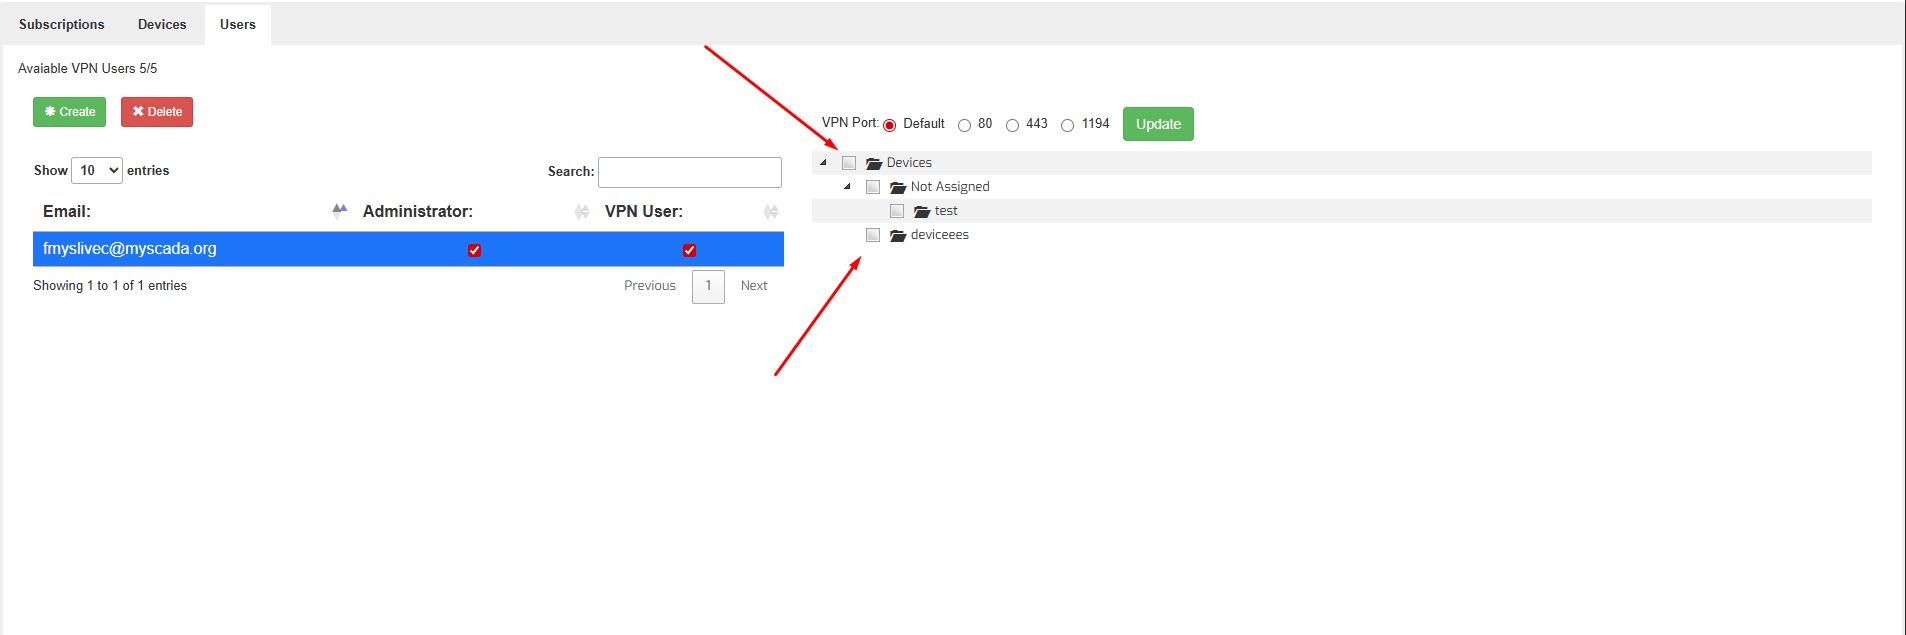
3. User Management in the myACCESS Portal
Go to the myACCESS Portal and switch to the “Users” tab:
➡️ https://shop.data-talk.eu/myaccess-portal/
- You will be listed by default as the first user.
- To add new users, click “Create”, then provide the email address of the new user.
- The user will receive an email invitation with an activation link.
- After activation, make sure to check the box labeled “VPN User” to enable VPN access for that user.
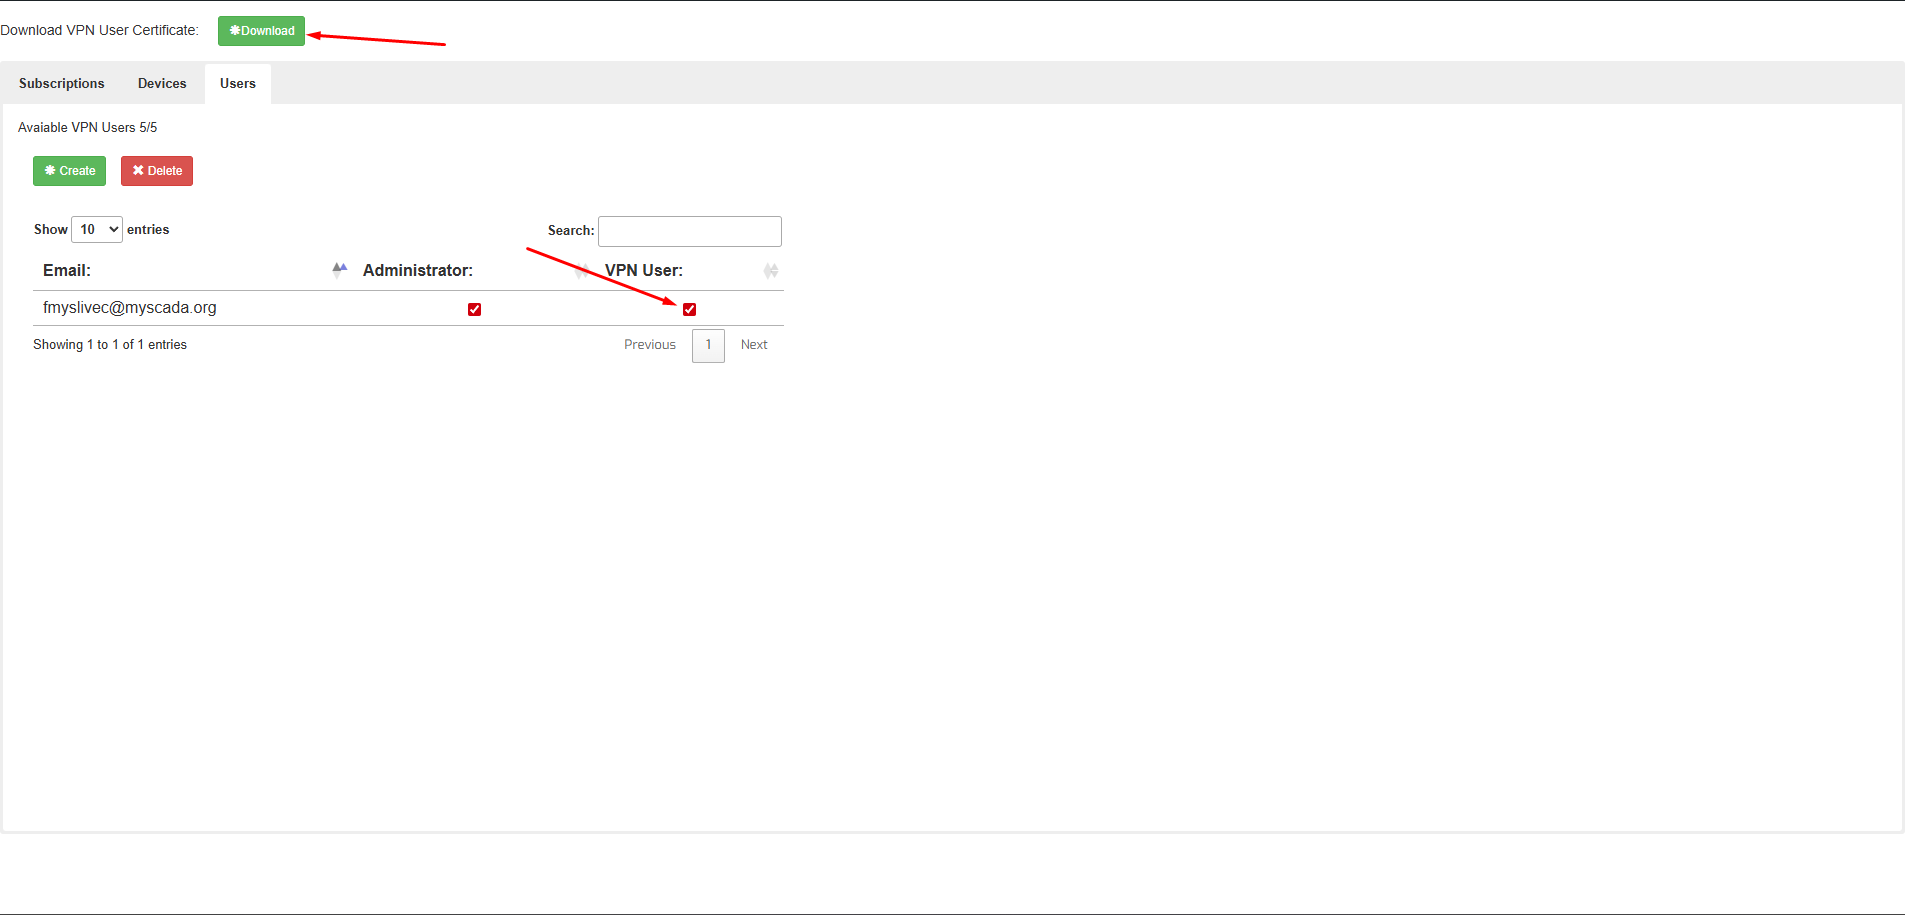
4. Download the VPN Certificate
Once the user is activated as a VPN user, you will see an option in the top section to download the VPN certificate. This .zip file is required to connect.
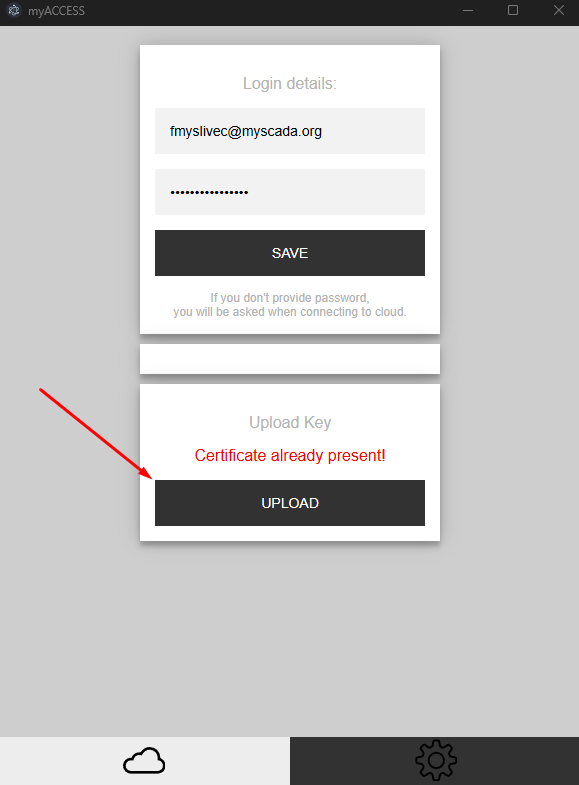
5. Configure the myACCESS VPN Application
- Open the myACCESS app as Administrator
- Click the gear icon (⚙) to open Settings
- Enter your login credentials (the same as your shop login at shop.data-talk.eu)
- Upload the VPN user certificate via the “Upload Key” option
6. Connect to a Device
After successful login and key upload:
- Available devices will appear under the cloud icon (☁)
- Click on the desired device to initiate the VPN connection
Once connected, you can access the remote device’s local network — allowing, for example, access to IP cameras, PLCs, or file servers.